TL;DR

Get business pricing on tools and workshop supplies
- Business-only prices and quantity discounts
- Tax-exempt purchasing
- Multiple users, one account, clear invoices
Jobsite inspections catch issues early when you walk the work on a regular schedule, add checks as tasks and conditions change, and tailor your checklist to the project. Record each finding with its location, risk, evidence, owner, and due date, then verify the fix in person. Stop or isolate work when conditions create immediate danger, and follow applicable rules for inspections and qualified personnel.
A missing guardrail can turn a routine morning into a fall emergency, but the first clue may be as ordinary as a crew moving the guardrail to bring material through. Jobsite inspections help you catch that change while there is still time to fix it before the next crew arrives or the work gets covered.
This guide shows you how to conduct jobsite inspections that catch issues early: when to walk, what to look at, how to bring workers into the process, and how to turn a note into a completed repair. You’ll also see how to coordinate safety and quality checks without blurring what each one is meant to find.
A clipboard or phone can help you record what you see, but the tool is not the inspection. The useful part is the loop: look closely, set a clear action, and verify the fix. That routine can keep a loose ladder, missed penetration detail, or blocked access route from becoming a larger problem.
Set a regular inspection cadence, then add checks before high-risk tasks, after site or weather changes, and before work gets concealed.
Tailor your checklist to the project phase and active hazards, including access, housekeeping, fall protection, equipment, and open actions.
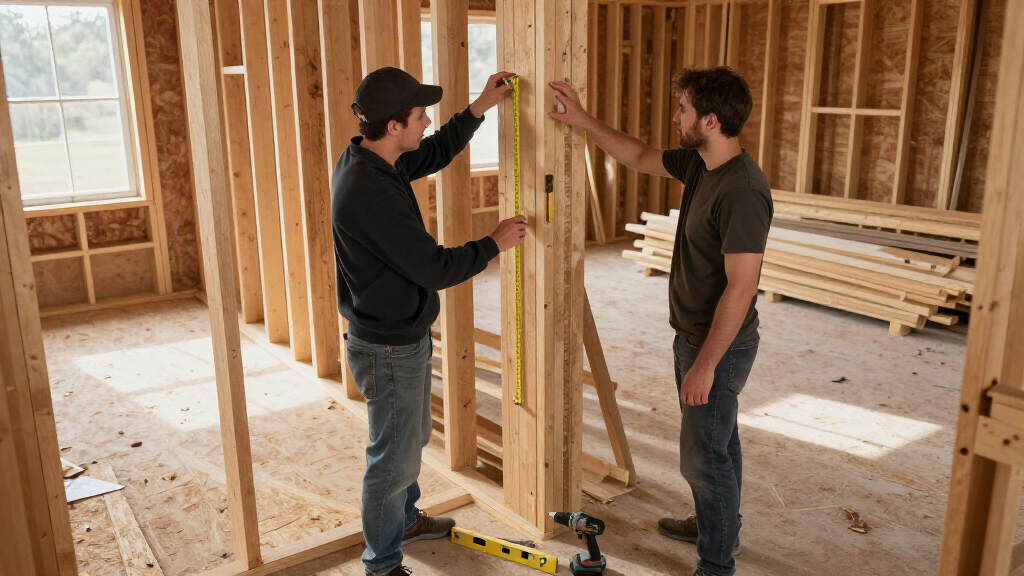
Walk the work in progress, compare conditions with plans and methods, and ask workers what changed.
For each finding, record the exact location, condition, risk, evidence, immediate control, owner, and due date.
Verify each correction in person and investigate repeat findings for a planning, training, or procedure problem.
Catch the small things before they become big problems.
Jobsite inspections work when they follow the work: walk on a steady rhythm, add checks when tasks or conditions change, and turn each observation into an assigned fix that someone verifies in person.
Set a routine that catches problems before work moves on
Use a consistent schedule that fits the project, then add targeted walks at moments when exposure changes. A morning check can catch overnight changes; a task check can catch hazards before the crew commits to the work.
Walk on a reliable cadence
Plan who inspects, which areas they cover, and how findings reach the people responsible for action.
Check before risk rises
Inspect before excavation, elevated work, a concrete pour, or another high-risk activity begins.
Walk again after change
Rain, heat, a delivery, a shifted setup, or a new crew sequence can make yesterday’s safe route unsafe today.
Use a checklist that reflects the work in front of you
Keep the form focused enough to use thoughtfully. Let project plans, active hazards, and the work phase shape what gets attention. The checklist is a prompt; direct observation is the inspection.
Compare the plan with what is happening on site
Walk where work is underway. Review relevant plans, permits, and earlier findings. Ask workers what changed; the gap between the expected sequence and today’s setup is often where a developing issue first appears.
Go to the work
Observe the task, access, protections, and surrounding conditions directly.
Compare conditions
Check actual setup against the approved method, plans, and expected quality.
Ask the crew
Try: “What changed since setup?” or “Where are you working around the plan?”
Revisit old findings
Return to the exact spot and confirm the correction holds during the shift.
Address immediate danger at once
Rank findings by likelihood and severity of harm, how many people may be exposed, and how quickly conditions could worsen. Stop or isolate affected work when conditions create immediate danger, and notify the responsible supervisor.
“Uncovered floor opening beside the east stair landing, exposed to foot traffic. Restrict access now; install and secure a cover before work resumes.”
Write it so someone can fix it without guessing
A finding is easier to close when the record gives the responsible person a precise location, clear condition, risk, evidence, and a practical next step. Assign an owner and due date, then verify the correction in person.
Connect safety and quality checks with clear criteria
The same walk may reveal both a hazard and a defect. Coordinate timing and share relevant findings, while keeping each check tied to the right expertise and standard.
| Inspection lens | Safety check | Quality check |
|---|---|---|
| Primary question | Could someone be harmed by this condition? | Does the work meet plans and specifications? |
| Typical evidence | Exposure, access, protection, equipment condition | Dimensions, materials, installation, finish |
| Closeout | Control exposure, assign action, verify safe condition | Document variance, assign correction, verify conformance |
Track what helps the next walk get smarter
Counts alone can mislead: more findings may mean a more thorough inspection. Look for recurring locations or tasks, overdue actions, and time to close high-risk issues. Repeated problems can point to a planning, training, supervision, or procedure gap.
Track direction and context; these bars are categories, not site performance data.
The form supports the inspection. The loop makes it work.
Involve workers, adapt checks as conditions change, and close each action with an in-person verification. Use digital tools, photos, or remote imagery to support the work where useful; they complement close-up observation and conversation. Follow the rules and project requirements that apply to your location, including requirements for qualified personnel.
Set a Routine That Catches Problems Before Work Moves On
Jobsite inspections work best when you follow a regular schedule and add checks at moments when risk changes. Walk the site at a cadence that fits the project, then add inspections before high-risk tasks, after major weather or site changes, and before work gets covered or handed to another crew. The schedule should reflect the hazards and applicable rules for your job.
Think of the routine as a series of checkpoints along the work path. A concrete crew may need a check before a pour, while a framing crew may need another before sheathing hides blocking or connections. For example, if rain turns a clean access path into slick clay, yesterday’s walk does not tell you whether today’s route is safe.
Plan who will inspect and what triggers an extra walk. A trained person needs the knowledge and authority to recognize hazards and start corrective action; some activities or equipment call for a designated competent or qualified person under applicable rules. Check the requirements that apply to your location and project rather than assuming one schedule fits every site.
Use both calendar and condition-based checks. A morning walk can catch overnight changes, while a targeted check before excavation or elevated work can catch task-specific hazards. If a crew changes its setup after lunch, inspect that change too. A reliable routine follows the work, not just the date on the form.
Popular right now

KitchenAid Artisan 5-Quart Tilt-Head Stand Mixer, Almond Cream

Ninja Foodi Smart Dual Heat Air Fry Oven, 13-in-1, Silver (SP351)

KitchenAid Classic Series 4.5-Quart Tilt-Head Stand Mixer, Onyx Black
As an affiliate, we earn on qualifying purchases.
Use a Checklist That Matches the Work in Front of You
A useful jobsite inspection checklist covers core site conditions and the hazards tied to the current work phase. Include access and housekeeping, fall protection, scaffolds and ladders, excavations, electrical hazards, equipment, personal protective equipment, material storage, work quality, and open corrective actions. Then tailor those items to the plans, hazards, and activities on your project.
Start with the ground in front of you: Is the access path clear? Are cords crossing a wet walkway? Are materials stacked where a forklift needs to turn? Next, look at active work and its protections. A checklist that asks only whether fall protection is present may miss that the crew moved an anchor point or left a floor opening uncovered after shifting materials.
Keep the form focused enough to use in the field. A generic list with dozens of boxes can turn into a fast series of checks with little thought behind them. On a site where the crew is setting roof trusses, bring the relevant fall hazards and access controls to the front; during a utility phase, give excavation protection and underground services more attention.
Use the checklist as a prompt, not a substitute for looking. Imagine a delivery arriving while a walkway is already narrow. The form may remind you to check access, but your walk shows whether the new pallet blocks the route. Write down project-specific checks when the sequence changes, then update the routine so the next walk catches the same risk.
Walk the Work and Ask the Crew What Changed
To conduct a useful jobsite inspection, walk where the work is happening, observe the task in progress, and ask workers what has changed since the last check. Compare actual conditions with the approved work method, project plans, and expected quality. Review permits and prior findings when they affect the area you are inspecting.
A checklist can tell you to inspect a scaffold; direct observation tells you whether someone is climbing the braces, whether the access ladder is secured, and whether a new load has changed the setup. A worker may also tell you that the designated material drop zone shifted because another trade blocked it. That detail matters because the hazard often lives in the gap between the plan and the day’s actual sequence.
Talk with the people doing the work in a practical, blame-free way. Ask, “What changed since setup?” or “Where are you losing time or working around the plan?” A concrete crew might point out that a hose keeps pulling a temporary barrier open. You can see the gap yourself, then assign a fix that works with the task rather than relying on a warning sign that keeps falling over.
Check old findings while you are nearby. If the last walk flagged a blocked fire extinguisher or a damaged ladder, look at that exact spot and confirm the condition. A photo can help you remember what you saw, but it cannot replace checking the area in person or asking the worker whether the repair holds up during the shift.
Rank Findings by Risk and Control Immediate Danger
Prioritize inspection findings by how likely they are to cause harm, how severe that harm could be, how many people could be exposed, and how quickly the problem could worsen. An imminent danger needs immediate action. Other issues still need a clear priority and deadline so they do not sit open while crews work around them.
Say you find a missing cover on a floor opening near a busy material route. People could step into it before the next scheduled walk, so protect the area and notify the responsible supervisor right away; stop or isolate affected work when appropriate. A scuffed paint mark on a cabinet door may need repair too, but it does not carry the same immediate exposure.
Use plain descriptions that help the next person understand the risk. “Unsafe area” gives a crew almost nothing to act on. “Uncovered opening beside the east stair landing, exposed to foot traffic” identifies the condition and location. State the immediate control, such as restricting access, and what needs to happen before workers return.
Give exposure and timing real weight. A minor-looking issue in a tight, crowded work area can affect several trades at once. A loose extension cord might become a trip hazard during a quiet setup, then a serious problem when a crew pushes a loaded cart through in low light. The right response depends on actual conditions, the task, and applicable requirements.
Protect people first. Stop or isolate affected work when appropriate, notify the responsible supervisor, and put effective controls in place before work resumes.
Write Findings So Someone Can Fix Them Without Guessing
A jobsite inspection finding should tell the responsible person exactly where the problem is, what is wrong, what risk it creates, and what action must happen by when. Add a photo or other evidence when it helps, along with any immediate controls already in place. A vague note such as “fix safety issue” leaves the crew guessing and makes reliable closure harder.
Use a simple sequence each time you record an issue:
- Pinpoint the location: identify the building, floor, grid, room, or work area.
- Describe what you observed: name the condition in direct language.
- Record exposure and controls: explain who may be affected and what protects them now.
- Assign an owner and due date: name the person responsible and set a practical deadline.
- Verify and document closure: return to the location, check the correction, and record the result.
For example: “Level 2, east stair landing: opening cover removed for material move; foot traffic exposed. Area barricaded. Lead carpenter to install and secure a rated cover before access resumes; supervisor to verify.” That record gives the crew a location, a condition, a control, an owner, and a way to confirm the fix.
Keep evidence tied to the action. A timestamped photo can show the original condition and the repaired condition, while a digital checklist can assign the task and track its due date. Paper works too if your team can find the record and follow it. Pick the method your crew will use consistently, then close the loop in the field.
Coordinate Safety and Quality Checks Before Work Gets Hidden
Safety inspections look for hazards and protective controls; quality inspections check whether work meets plans, specifications, and acceptance criteria. The two checks can happen on the same walk, but they need clear scopes so a safety concern does not get mistaken for a quality defect or vice versa. Coordinate the timing around the work sequence.
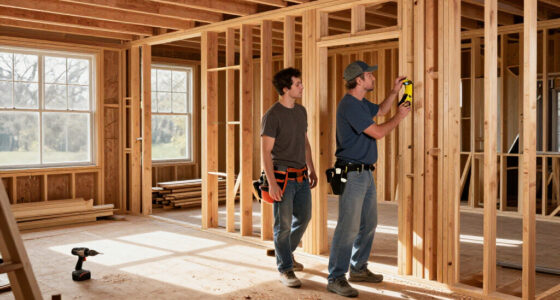
Before drywall closes a wall, for example, the team may need to confirm that required blocking and rough-in details match the approved plans while also checking that temporary cords and access routes do not create a hazard. The safety and quality questions overlap in location, but they ask different things. One asks whether people can work safely; the other asks whether the installed work meets the job’s requirements.
Set a hold point before an important detail becomes concealed or repeated across multiple units. If a superintendent spots a misplaced sleeve in the first room, the crew may correct the remaining rooms before finishes go in. A short check at that moment can save a line of demolition and patching later.
Match the inspector to the question. Some checks call for trade knowledge, technical review, or a designated competent or qualified person under applicable rules. A digital form or a quick photo cannot certify every condition. Confirm the required inspection duties and records for your project, then make the handoff clear between the person checking the work and the person authorizing it to proceed.
Close Every Finding and Use Repeat Issues to Fix the System
An inspection is only complete when someone verifies the correction and records that the issue is closed. Assign an owner, set a due date, and return to the work area to check that the fix holds under real conditions. If you find the same problem again, look for a cause in planning, training, supervision, or site procedures instead of treating every repeat as a fresh one-off.
Suppose crews keep leaving scrap lumber in the same access aisle. Clearing it after each walk helps today, but the pattern may point to a missing laydown area or a delivery sequence that pushes material into the route. Ask the crew why it keeps happening, adjust the storage plan, and check the aisle again after the next delivery.
Track useful measures such as overdue actions, repeat findings, time to close high-risk issues, and patterns by location or task. A high finding count alone does not prove the job is performing poorly; it can also mean the inspection is thorough and workers are reporting concerns. Look for whether serious issues close quickly and whether the same condition keeps returning.
Digital forms, mobile photos, dashboards, and timestamps can make assignments and records easier to follow. Drones or 360-degree cameras can help review a large site, roof, or façade; sensors and wearables may flag heat or equipment proximity. Use those tools to direct attention, not replace close-up observation. A camera cannot ask why a crew rerouted its access, and a sensor signal needs someone to check the actual conditions.
Frequently Asked Questions
How often should you inspect a jobsite?
Set a regular cadence based on project risk and applicable rules, then add checks when tasks or conditions change. For example, inspect before a high-risk task and again after weather changes the work area. Some equipment and activities have specific inspection requirements, so verify the rules for your project.
Who should conduct a jobsite inspection?
A trained person with the knowledge and authority to recognize hazards and start corrective action should conduct the inspection. Some hazards or equipment require a designated competent or qualified person under applicable rules. A foreman can involve workers and trade leads, while keeping required technical checks with the right person.
What should a jobsite inspection checklist include?
Cover access, housekeeping, fall protection, scaffolds and ladders, excavations, electrical hazards, equipment, PPE, material storage, work quality, and open corrective actions. Tailor the checklist to the active tasks and project phase. During a framing push, for example, access and fall protection may need more attention than they did during site grading.
What should you do when an inspection finds immediate danger?
Protect people first. Stop or isolate affected work when appropriate, notify the responsible supervisor, and put effective controls in place before work resumes. If an opening is exposed beside a busy route, restrict access and secure the cover before workers use that route again.
Are photos or digital inspection tools enough?
Photos and digital tools can improve records, timestamps, assignments, and follow-up, but they do not show every detail. Pair them with direct observation and worker conversations. A photo may show a barricade in place without showing that crews keep moving it to make deliveries.
Conclusion
Make your inspection routine follow the work: walk at set intervals, add checks when conditions change, and stop or isolate immediate danger before the crew carries on. Give every other finding a clear location, owner, deadline, and in-person verification.
That is how a small gap gets fixed while it is still a small gap. Catch it before the wall closes, the next crew arrives, or the rain turns the path to mud.