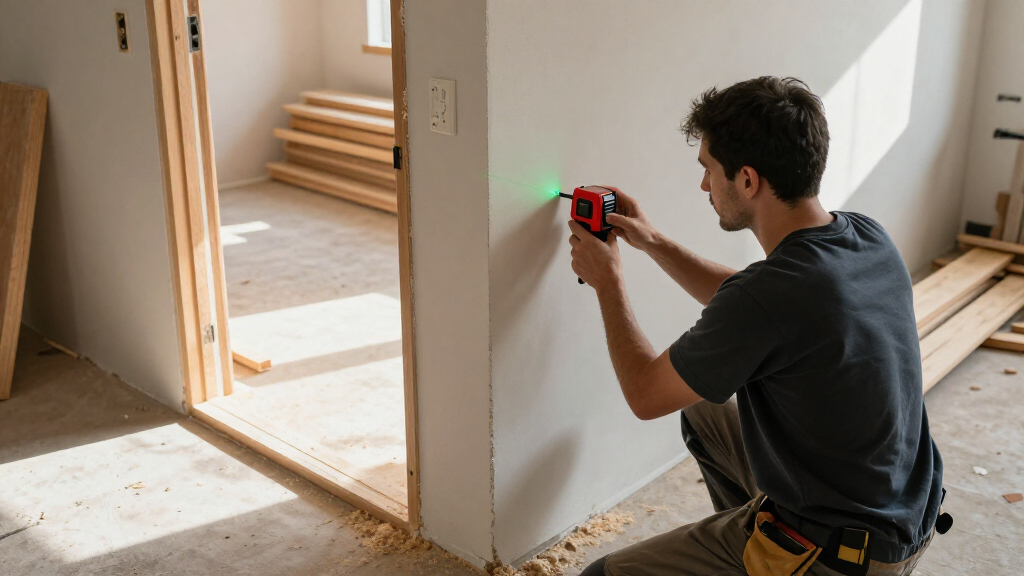

TL;DR

Get business pricing on tools and workshop supplies
- Business-only prices and quantity discounts
- Tax-exempt purchasing
- Multiple users, one account, clear invoices
Choose a laser measure by starting with your most frequent task, then matching its working range, stated accuracy, targeting method, and durability to the jobsite. Simple room takeoffs often need distance, area, and memory functions; outdoor work calls for an outdoor-rated range and a reliable way to see or detect the target. Use the correct reference point, keep the lens clean, and independently check dimensions where an error could cost time or materials.
A laser measure can turn a long room takeoff from a tape-and-pencil shuffle into a quick series of button presses. But a tool that works smoothly across a bright, empty room may frustrate you on a sunny slab or a crowded stairwell. The right choice depends on where you measure, how far you reach, and how much accuracy the task calls for.
This guide shows you how to match range and accuracy, targeting, jobsite durability, and useful functions to different jobsite tasks. You’ll also get a practical buying sequence and checks that help keep a fast measurement from turning into a costly mistake. Specs vary by manufacturer and model, so check the manual and product specifications for the instrument you plan to use.
Start with the measurements your crew repeats most, then choose range and functions around those jobs.
For outdoor work, check digital targeting or receiver support and manufacturer guidance, not rated range alone.
Read the accuracy specification and note whether it changes at longer distances.
Treat IP ratings as tested dust and water protection; check impact details separately.
Set the correct reference point, steady the tool, keep its lens clean, and independently check critical dimensions.
Choosing the Right Laser Measure for Different Jobsite Tasks
Start with the measurements your crew repeats most. Match the tool’s working range, stated accuracy, targeting method and durability to the real conditions on site.
Choose the work you repeat.
Allow margin beyond routine spans.
Plan for light and surface contrast.
Check critical dimensions independently.
Five checks before you buy
Specs vary by manufacturer and model. Read the product specifications and manual for the instrument you plan to use.
List your most repeated measurements, then select range and functions around those jobs.
For exterior work, check digital targeting or receiver support and outdoor guidance.
Read how accuracy is specified and whether it changes at longer distances.
Check the IP rating for dust and water protection; review impact details separately.
Set the reference point, steady the tool, clean the lens and verify costly dimensions.
Match the tool to your routine
A useful shortlist begins with the measurements you take most often, not the biggest number printed on a box.
Keep it simple
Distance, area and volume functions, a readable display and memory can cover estimating and finish checks. A compact body is easy to carry room to room.
Support repeatable setup
Continuous measurement, reference-point options and a tripod mount can help with framing, interior layout and larger commercial spaces.
Use geometry carefully
An inclination sensor and indirect height functions can help with ceilings and stairwells. Stable positioning and correct setup matter.
Build in range margin
Compare the longest distance you regularly measure with the manufacturer’s rated range. Leave room for difficult targets and real site conditions.
Fit accuracy to tolerance
Check the conditions attached to the accuracy specification, including any change at longer distances. Estimating and final fabrication may need different checks.
Targeting changes with the light
The practical test is whether you can confirm the beam lands on the intended surface.
Visible beam
A visible beam and plain target surface usually suit everyday room dimensions, flooring and paint estimates.
Make the target clear
Long bays and bright rooms can benefit from a camera or digital viewfinder and a range rating suited to the span.
Plan for sun and distance
Look for digital targeting, receiver support where available, tripod mounting and outdoor guidance. Glare can make the practical limit shorter.
Buy for the measurements you repeat
Add functions when they remove a real step from your daily workflow. Extra menus can slow occasional users.
| Jobsite task | Useful features | Example |
|---|---|---|
| Room dimensions & estimating | Distance, area and volume; readable display; memory | Room takeoff for a project estimate |
| Flooring, painting & finish work | Reliable short-range accuracy; area or wall segments; compact design | Checking room surfaces and finish dimensions |
| Framing & interior layout | Continuous measurement; reference options; tripod mount | Repeatable interior layout measurements |
| Ceilings & stairwells | Inclination sensor; indirect height functions; stable mounting | Measuring a hard-to-reach height |
| Large interiors | Longer rated range; clear display; memory or Bluetooth | Warehouse bay dimensions |
| Exterior elevations & site work | Camera or digital target; receiver support; tripod; outdoor range guidance | Measuring across a sunlit site |
From routine to reliable reading
Use this sequence to narrow the shortlist and keep measurements repeatable once the tool is on site.
List the work
Write down three common measurements and the longest regular span.
Match the spec
Compare range and stated accuracy with actual distance and tolerance.
Check the target
Account for sunlight, contrast and available targeting aids.
Fit the workflow
Review functions, power, memory, connectivity, grip and controls.
Verify the result
Use an independent method for critical dimensions.
Check the details beyond range
“Jobsite ready” is not a standardized rating. Compare the model’s own specifications with the way your crew works.
Dust, water & impact
Review the specific ingress-protection rating for dust and water. Check impact protection separately, along with grip and display readability.
Keep records moving
Compare battery type and charging. Confirm Bluetooth, apps or construction software work with the devices and workflow you actually use.
Make it repeatable
Reference-point options, a tripod thread, level or inclination sensor, and glove-friendly controls can make daily use easier.
Use a repeatable setup
A fast reading is useful when the tool starts from the right point and stays steady.
Set the reference point. Select front, rear or tripod reference to match the measurement.
Steady the instrument. Hold or mount it securely and follow the manual for indirect measurements.
Keep the lens clean. Dust or smudges can interfere with reliable readings.
Check costly dimensions. Confirm critical points independently when an error could affect materials or layout.
Match the Laser Measure to the Work You Do Most
Choosing the right laser measure for different jobsite tasks starts with the measurements you repeat most often. Match the tool’s rated range, stated accuracy, and targeting method to those jobs, then add only the features that improve your daily workflow. A tool built around your routine is more useful than one chosen for its biggest number on the box because advertised capability only helps when the tool can acquire the target and deliver a result in your actual conditions.
Think through a typical week. If you spend mornings measuring rooms for estimates and afternoons checking finish dimensions, short-to-medium indoor distances, area calculations, a readable display, and memory may cover most needs. A compact unit is easier to carry from room to room, much like keeping a pencil in your pocket instead of walking back to the gang box for one. The tradeoff is that a compact indoor tool may lack the targeting aids or working range needed for long exterior measurements.
Different jobsite tasks call for different capabilities. An exterior elevation measurement may call for a viewfinder or digital target, a tripod mount, and a range rating suited to outdoor use. A ceiling height over a stairwell may call for an inclination sensor and indirect height functions. A feature-rich model can be unnecessary for basic estimating, while an indoor-focused model may struggle when your target sits in bright sun. Each added function can reduce a manual step, but it can also add menus and setup choices that slow occasional users.
Write down your three most common measurements and the longest distance you regularly take. For example, a superintendent handling room takeoffs, flooring checks, and interior layout has a different shortlist from a crew measuring long exterior elevations. Note where the targets are and who records the results, too: a measurement that must be transferred to an estimate may make memory or compatible connectivity valuable. This inventory gives you a practical starting point and helps you avoid paying for features that stay buried in a menu.
Choose Enough Range and Accuracy for Real Conditions
A laser measure’s rated range and stated accuracy tell you whether it fits the distance and tolerance of your work. Check how the manufacturer specifies both values, and whether accuracy changes at longer distances; then compare the rating with the longest measurements you actually take. Leave some range margin because a hard-to-see target or bright conditions can make a measurement difficult before you reach the headline limit. Range is the distance at which the tool may measure under stated conditions, not a promise that every target will be easy to acquire that far away.
For a room estimate across a 24-foot living space, a tool suited to common indoor measurements may be a sensible fit. A long warehouse bay or exterior elevation needs a different conversation. Range figures do not guarantee the tool will acquire every target at that distance under every lighting condition. For long interior spans, consider whether you can aim at a stable, contrasting surface; outside, glare and low target contrast can make the practical limit shorter. A targeting aid may solve the aiming problem better than simply buying a higher range rating.
Accuracy matters most when small errors stack up or feed into expensive work. If you use a measurement to estimate flooring for several rooms, a little drift in individual readings can affect the material order. Repeated dimensions may compound in a takeoff, and an overestimate can mean extra cost while an underestimate can interrupt work for a reorder. If you’re checking a critical dimension for fabrication or layout, confirm it with an independent method. A laser measure can speed up a long wall check, but a tape, square, or approved layout process may be better for the final critical point.
Look for the conditions attached to the advertised specification. A manufacturer may describe accuracy in a specific format or note different performance at longer range. Those details matter more than comparing two headline numbers without context. On a real job, a clear target at 30 feet may be easier to measure reliably than a small, dark target at a shorter distance. Consider the tolerance the task allows: a tool that is adequate for a rough estimate may not be appropriate for setting out or ordering custom-fabricated material.
Pick a Targeting Method That Works Indoors and Outside
Choose a targeting method based on whether you can see and hit the target reliably in your usual lighting. Indoor work often suits a visible beam and a plain target surface; outdoor work may need a camera viewfinder or digital target, receiver support where available, and an outdoor-appropriate range rating. A green beam can be easier to see than a red one, though conditions and the instrument still affect visibility. The practical question is whether you can confirm that the beam lands on the intended surface, not simply whether the beam is visible nearby.
Imagine setting up across a sunlit parking lot. The laser dot may wash out against the concrete, even if the tool’s range rating looks generous. A digital viewfinder gives you a screen view of the target, while a compatible receiver can help detect the beam where supported. These aids can make a longer measurement usable, but they add cost and may require a steady setup or compatible accessories. For an indoor office partition, those extras may add little value if the beam is easy to place by eye.
| Work setting | What to look for | Example |
|---|---|---|
| Interior rooms | Visible beam, readable display, useful area functions | Measuring a bedroom for paint or flooring |
| Bright interiors or long bays | Clear targeting aid and suitable rated range | Checking dimensions in a large commercial space |
| Exterior elevations or site work | Camera or digital target, receiver support where available, tripod option | Taking a measurement across an open slab in daylight |
Choose based on your real targets, not the color alone. A visible green dot does not erase glare, distance, or poor target contrast. Check the manufacturer’s outdoor guidance and try the intended targeting method in conditions similar to your site when you can. Testing the workflow matters because a viewfinder that appears helpful in a showroom may still be awkward to aim one-handed or in the positions your crew actually uses.
Pay for the Measurement Functions You’ll Actually Use
Choose measurement functions that save steps on recurring work, such as area for flooring, volume for room estimates, or continuous measurement for layout. Many basic models handle distance, while more advanced ones may add indirect height, wall segments, inclination sensing, memory, or Bluetooth. The model depends on the tasks you repeat and how your crew records results. A built-in calculation can reduce arithmetic and transcription, but it does not remove the need to check that the right dimensions and reference points were entered.
Use this quick sequence before comparing feature lists:
- List the jobs: Write down the measurements you take each week, such as room length, wall segments, ceiling height, or exterior dimensions.
- Mark the repeated calculations: If you regularly measure floor area, check for area mode; if you calculate room volume, look for volume mode.
- Flag hard-to-reach points: For ceiling peaks or stairwells, check for an inclination sensor and indirect height functions.
- Check how results travel: If measurements go into a spreadsheet, app, or construction software, confirm Bluetooth or app compatibility with your actual devices and workflow.
- Cut rarely used extras: If a feature appears once a year, decide whether it saves enough time to justify the added cost and complexity.
For example, a flooring crew measuring several rooms can enter lengths and widths into area mode instead of doing each multiplication on paper. That can speed up a takeoff and reduce calculation mistakes, but it still matters whether the operator has measured the full room and handled alcoves or offsets correctly. A framing lead laying out repeated offsets may get more from continuous measurement and reference-point options. Features only save time when you know where they sit in the controls and your workflow can use the result.
Indirect measurements use geometry to calculate a hard-to-reach dimension from measured distances and angles. They can help when you cannot put the instrument directly at a ceiling peak, but they depend on steady positioning and correct setup. Small aiming or angle errors can affect the calculated result, so the convenience comes with a greater need for stable positioning. Follow the manual, mount the tool when the task calls for it, and check high-consequence results independently.
Check Durability, Power, and Controls Before You Buy
A jobsite-ready laser measure should suit the dust, moisture, handling, and pace of your work. Check the specific ingress-protection rating for dust and water resistance, plus any impact-protection details the manufacturer provides. “Jobsite ready” is not a standardized rating, and an IP rating does not tell you how well a tool survives a drop. A rating can help you judge exposure to dust or splashes, but it should not be treated as permission to leave the instrument in conditions outside its stated limits.
Picture a tool moving between a dusty framed house, a damp concrete floor, and a truck cab. A rubberized grip, protected display, and controls you can use with gloves can matter more day to day than a long feature list. Inspect the button layout and screen readability; tiny symbols are frustrating when you need to record three room dimensions before the crew moves on. Controls that are easy to identify also reduce the chance of changing a setting or reference point without noticing.
Power also affects the daily rhythm. Check the battery type, whether the unit recharges by cable, how easy replacement batteries are to source, and what the manual says about expected use. A rechargeable model may simplify charging at the end of the shift, while replaceable batteries can be handy when you have no charging setup nearby. Consider the cost of a tool being unavailable mid-shift as well as the purchase price: crews working away from charging access may value a spare battery more than a built-in rechargeable pack. Memory can reduce repeated trips to the notebook, and Bluetooth can cut transcription when it works with your phone or software.
Weigh convenience against complexity. If the tool’s menus slow down a simple room takeoff, a less elaborate model may serve you better. If your crew records dozens of measurements digitally, compatible transfer features may save enough retyping to earn their keep. Check these details before purchase rather than assuming every newer model includes the same protections, battery setup, or connectivity. Handling a sample tool can reveal whether the screen, grip, and controls suit the people who will use it every day.
Use a Repeatable Setup to Keep Measurements Trustworthy
A reliable laser measurement starts with the right reference point, a steady instrument, and a clean lens. Select whether the tool measures from its front, rear, or tripod reference, place it consistently, and follow the manual for any indirect calculation. For critical dimensions, check the result with an independent method before it drives layout, ordering, or fabrication. Repeatability matters because consistent setup lets you compare readings and spot a likely outlier before it becomes part of a larger takeoff.
Consider a crew measuring a long interior wall before ordering material. If one reading starts from the tool’s front and another from the rear, the results can differ by the instrument’s own length. That small setup change is easy to miss when you’re moving fast, but a wrong reference point can turn an otherwise clean series of readings into bad numbers. A consistent routine also makes it easier for another crew member to reproduce a measurement if questions come up later.
- Clean the lens: Dust or fingerprints can interfere with the measurement. Use the care method in the manual.
- Set the reference: Confirm front, rear, or tripod reference before taking the reading.
- Steady the tool: Hold it firmly or use a tripod when distance, angle, or access makes hand-holding unreliable.
- Aim at a suitable target: Confirm you can see or detect the target with the tool’s intended method.
- Verify high-consequence results: Compare the dimension against a known reference or another suitable measuring method.
A tripod thread and reference-point options help with repeatable setups, while a level or inclination sensor can support certain indirect calculations. These aids do not remove the need to follow the instructions. If a unit takes a hard hit or produces inconsistent results, follow the manufacturer’s verification and service guidance before relying on it for critical work. A quick check against a known distance can help reveal a problem, but use the manufacturer’s procedure to decide whether the instrument needs service.
Build a Shortlist for Your Crew’s Actual Tasks
A useful shortlist compares the laser measure’s capabilities with the jobs your crew does most, not with every feature on the market. Start by naming one primary task and one secondary task, then check range, stated accuracy, targeting, durability, and workflow fit for those jobs. This gives you a clear way to compare a compact indoor tool with a model built for long or difficult targets. It also makes compromises visible: spending more on outdoor targeting may be worthwhile for frequent elevations but poor value if the crew almost always measures enclosed rooms.
Say you supervise a finish crew that measures room dimensions, flooring areas, and wall segments most days. A compact unit with area and wall-segment functions, memory, a readable display, and accuracy suited to your measurements could fit better than a model designed around exterior targeting. If your crew also measures elevations outside each week, add a viewfinder, receiver support where available, and tripod setup to the list. The added cost has a clearer case when those features prevent missed readings or repeated setup attempts regularly.
A different crew may spend its days in commercial interiors. Longer distances, clear displays, memory, and Bluetooth transfer might matter more when one person collects dimensions across a large building and another enters them into a digital estimate. Connectivity only helps if the model works with the crew’s devices and software, so confirm compatibility instead of assuming the app will talk to your system. Consider the cost of a failed transfer, too: a feature that creates another manual check may not save time in practice.
Compare manufacturer specifications side by side, including how accuracy is stated, the stated range, the protection rating, battery details, and targeting aids. Then compare controls and grip in person if possible. A tool that fits your common measurements and your crew’s habits is easier to use consistently. That consistency is part of getting dependable results from the instrument. If two models meet the same job requirements, ease of use and support can be better deciding factors than a feature you rarely need.
Frequently Asked Questions
What range do I need for typical construction work?
Start with the longest measurements you regularly take, then allow some range margin. Outdoor range can fall short in practice when the target is difficult to see or light washes out the beam, so check the manufacturer’s guidance for the conditions you face.
Can a laser measure replace a tape measure?
A laser measure works well for many distance, area, and estimating tasks. A tape, square, or another method can still be a better choice for short measurements, physical layout, or critical checks where you need direct contact with the work.
Are green laser measures better than red ones?
People often find a green beam easier to see than a red one, especially in bright interiors. Visibility still depends on lighting, distance, target contrast, and the instrument, so outdoor targeting aids such as a camera viewfinder or compatible receiver can matter more.
Can I use a laser measure outside?
Yes, if the model and targeting method suit the distance and lighting. Check for an outdoor-appropriate range rating, digital targeting or receiver compatibility where available, and the manufacturer’s guidance for exterior use.
What does an IP rating tell me about a laser measure?
An ingress-protection rating describes tested protection against dust and water entering the tool. Compare the exact rating with the conditions on your jobsites, and check impact protection separately because an IP rating does not guarantee drop resistance.
How do indirect height measurements work?
The tool measures distances and angles, then uses geometry to calculate a height you may not be able to reach directly. A steady setup and correct reference point matter; follow the manual and verify the result independently when the dimension has high consequences.
Do I need Bluetooth or an app?
Bluetooth can reduce retyping and help organize measurements when the tool works with your devices and software. If you mainly write down a few room dimensions, memory or a notebook may be enough; confirm compatibility before paying for connected features.
Conclusion
Choose your laser measure by starting with the work you repeat, then match its range, accuracy, targeting, and durability to those conditions. Add area, indirect measurement, memory, or Bluetooth only when those features remove steps from a task you do often.
Set the reference point before every reading and verify dimensions that could drive costly work. A dependable measurement starts with the right tool, but it ends with a steady hand and a number you trust.
Fall Picks
fall essentials
As an affiliate, we earn on qualifying purchases.