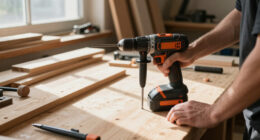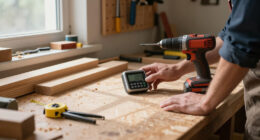

DIY and woodworking become far more approachable when you understand three things: what the project requires, which tools make sense, and how to work safely from the first measurement to the final cleanup. You do not need a workshop full of equipment to begin. You need a practical plan, a dependable core kit, and enough knowledge to recognize when a specialized tool will save time or improve accuracy.

Get business pricing on tools and workshop supplies
- Business-only prices and quantity discounts
- Tax-exempt purchasing
- Multiple users, one account, clear invoices
This hub is an orientation guide for homeowners, new makers, experienced DIYers, and anyone building a more capable tool collection. It covers project planning, measuring, cutting, fastening, corded and cordless tools, workshop organization, jobsite safety, and useful extras. Throughout the page, you will find links to ForemanBrief’s focused guides for comparing specific equipment categories in greater depth.
Start With the Project, Not the Tool
A common mistake is buying an appealing tool before identifying the work it needs to perform. Begin by defining the project in concrete terms. Are you assembling furniture, hanging shelves, framing a partition, repairing a fence, building cabinets, or making decorative pieces? Each task places different demands on power, precision, portability, and working space.
Before purchasing or setting up equipment, answer a few basic questions:
- Which materials will you cut, drill, fasten, sand, or finish?
- How thick and dense are those materials?
- Will the work happen at a bench, around the house, or outdoors?
- Is a nearby electrical outlet available?
- How precise must the finished result be?
- Which hazards will the work create, including dust, noise, sharp edges, and flying debris?
These answers help distinguish essential tools from conveniences. A compact cordless setup may suit repairs across several rooms, while repeated heavy cuts at a fixed workstation may favor corded equipment. Fine woodworking may demand careful layout and controlled cuts, whereas rough construction often prioritizes speed, durability, and easy movement around the site.
As an affiliate, we earn on qualifying purchases.
Build a Useful Core Tool Kit
A balanced starter kit combines hand tools, layout equipment, and a few versatile power tools. The exact mix depends on your projects, but most DIYers benefit from a hammer, screwdrivers, pliers, an adjustable wrench, a utility knife, clamps, a level, a square, and reliable measuring tools. Add suitable eye, hearing, respiratory, and hand protection before treating the kit as complete.
For powered work, a drill or impact driver and a general-purpose saw cover many common tasks. Buying tools individually gives you precise control over the collection, while a bundled kit may simplify the initial purchase. If you are comparing broad sets, the guide to the best power tool combo kits can help you review the category and decide which tool combinations fit your work.
A kit is valuable only when its contents match your needs. Count the tools you expect to use regularly, examine whether they share a battery platform, and consider storage, charging, replacement accessories, and future expansion. Avoid judging a collection merely by the number of pieces listed; accessories and minor components can make a package appear larger without adding the core machines your projects require.
cordless drill impact driver combo
As an affiliate, we earn on qualifying purchases.
As an affiliate, we earn on qualifying purchases.
Choose Between Cordless and Corded Power
When Cordless Tools Make Sense
Cordless tools are particularly useful when you move frequently, work outdoors, climb ladders, or operate away from accessible outlets. They also reduce cord management in small spaces. Battery voltage alone does not determine whether a tool suits a task, so consider the complete system: tool design, battery compatibility, charging arrangements, weight, and the duration of your typical work sessions.
Committing to one battery family can reduce the number of chargers and spare batteries you need. However, platform loyalty should not override suitability. Review the tools available in the system and make sure it supports the categories you are likely to add later.
When Corded Tools Remain Practical
Corded equipment can be a sensible choice for stationary work, extended sessions, and jobs where mobility is less important. There is no battery runtime to manage, but you must account for outlet access, extension-cord suitability, and trip hazards. Anyone planning a workshop or comparing equipment for sustained construction tasks can explore ForemanBrief’s guide to corded power tools for construction.
Many capable setups combine both formats. Cordless tools handle mobile drilling, fastening, and quick cuts, while corded machines remain ready at the bench. The right division is based on workflow rather than the idea that one power source is universally superior.
As an affiliate, we earn on qualifying purchases.
Measure and Mark Before You Cut
Accuracy begins long before a blade touches the material. Read the plan, inspect the stock, establish a consistent reference edge, and mark each component clearly. When several pieces must match, use a stop block, spacer, story stick, or template instead of measuring every part independently. Repeated measurements create more opportunities for small errors to accumulate.
A tape measure is central to construction and home improvement, but usability depends on the environment and task. Case size, marking visibility, reach, belt attachment, and overall handling can matter during everyday work. The guide to measuring tapes for construction provides a category-specific starting point.
Pair the tape with a suitable square and a sharp pencil or marking knife. Verify critical dimensions twice, mark the waste side of a cut, and account for blade kerf. For joinery or fitted components, test with scrap material and approach the final dimension carefully rather than assuming the first cut will be exact.
As an affiliate, we earn on qualifying purchases.
Understand the Main Cutting Tools
No single saw is ideal for every cut. A circular saw is portable and useful for breaking down sheet goods or cutting dimensional lumber. A miter saw supports repeatable crosscuts and angled cuts. A jigsaw follows curves and makes interior cutouts. A table saw is commonly associated with controlled ripping and repeatable workshop operations, while hand saws remain useful for quiet work, fine adjustments, and locations where setting up a power tool would be excessive.
For mobile straight-cutting work, compare blade compatibility, cutting capacity, adjustment controls, visibility around the cut line, ergonomics, and battery-system fit. ForemanBrief’s roundup of cordless circular saws offers a focused route into that category.
Whatever saw you use, install a blade intended for the material and desired finish. Support the workpiece so the offcut cannot pinch the blade, keep hands away from the cutting path, and wait for moving parts to stop before setting a tool down or reaching near the blade. A straightedge guide or cutting jig can improve consistency, especially when cutting large panels.
Drilling and Fastening Without Damaging the Work
Drills and impact drivers overlap, but they are not identical. A drill is a broadly useful choice for making holes and driving fasteners with controlled settings. An impact driver uses a different driving action and is often selected for repetitive fastening or demanding screws. Keeping both available can reduce bit changes and let each tool serve the task it handles most naturally.
When choosing an impact driver, consider its size, controls, bit interface, lighting, handling, and compatibility with batteries you already own. See the comparison of cordless impact drivers for a closer look at available options.
Good fastening technique matters as much as the tool. Use the correct bit type and size, hold it square to the fastener, and apply steady pressure. Drill pilot holes where splitting is a concern, particularly near board ends. Match the fastener to the material and environment, and avoid driving so deeply that the head crushes the surface or weakens the connection.
Create a Safer Work Area
Safety starts with the workspace. Provide stable footing, adequate lighting, clear access to exits, and enough room to control long boards or sheet materials. Remove loose clutter before operating a tool. Route cords and hoses away from walking paths, secure the work with clamps, and never rely on one hand to stabilize a piece while the other controls a cutting tool.
Personal protective equipment should match the hazard. Safety glasses are a baseline for many shop tasks, while face protection, hearing protection, respirators, protective footwear, and task-appropriate gloves may also be needed. Gloves can help with material handling but should not be worn around machinery when they could catch in moving parts. For wet or exposed working conditions, consult the guide to waterproof work gloves.
Visibility also matters around vehicles, equipment, and active work areas. If your projects place you near traffic or busy construction activity, review the options in ForemanBrief’s guide to construction site safety vests. Protective gear should fit properly, remain in serviceable condition, and be appropriate for the actual environment.
Do Not Overlook Lighting
Good lighting supports both safety and craftsmanship. Shadows can hide pencil lines, surface defects, fastener heads, and obstructions. General overhead lighting is useful, but portable task lighting helps when you work inside cabinets, beneath vehicles, in attics, or in areas where the power is disconnected.
Consider beam shape, mounting options, runtime, charging method, durability, and how easily the light can be positioned without occupying a hand. A rechargeable model may fit naturally into a mobile kit. ForemanBrief’s guide to rechargeable jobsite flashlights explores choices for these working conditions.
Set Up a Workshop That Supports the Workflow
A workshop does not need to be large, but it should make common operations straightforward. Arrange the space around a basic sequence: bring material in, inspect and measure it, make rough cuts, perform joinery or assembly, prepare the surface, apply the finish, and store completed parts safely.
- Keep frequently used hand tools within easy reach.
- Store blades, bits, and abrasives by type and size.
- Label chargers and batteries if several platforms are present.
- Provide flat assembly space and stable material support.
- Separate finishing supplies from sparks, heat, and ignition sources.
- Plan dust collection and cleanup before adding more machines.
Mobility can make a small shop more flexible. Rolling bases, folding supports, and stackable storage let one area serve several purposes. Leave enough clearance around machines for the largest material you expect to handle, not merely the footprint of the tool itself.
Develop Better Woodworking Habits
Reliable results come from repeatable habits. Mill or select stable material, identify reference faces and edges, and confirm that parts remain square as the project progresses. Dry-fit assemblies before adding glue. Use clamps to hold alignment, but remember that excessive pressure can distort parts or squeeze out too much adhesive.
Surface preparation should be deliberate. Begin with the appropriate abrasive for the surface condition, then progress through finer grits without skipping unnecessarily large steps. Remove dust between stages and inspect the work under angled light. Test stains, paints, oils, or other finishes on scrap from the same material because appearance can vary with species, preparation, and application.
Keep notes for projects you may repeat. Record dimensions, jig settings, hardware, mistakes, and successful adjustments. These details gradually become a personal reference library and can save more time than buying another specialized tool.
Maintain Tools and Accessories
Routine maintenance improves reliability and helps you spot problems before the next project. Disconnect power or remove the battery before changing accessories, clearing debris, or inspecting a tool. Follow the manufacturer’s instructions for lubrication, adjustment, storage, and replacement parts.
Check cutting accessories for damage and dullness, because a worn blade or bit can increase heat and encourage poor technique. Inspect power cords, plugs, guards, switches, battery housings, and chargers. Keep vents clear, store metal tools away from persistent moisture, and protect precision measuring equipment from impacts.
Consumables deserve organization too. Maintain a practical supply of commonly used drill bits, driver bits, blades, sandpaper, fasteners, pencils, and masking materials. Replenishing these items after each project prevents a minor shortage from stopping the next one.
Add Comfort Without Distracting From the Work
A functional work area can also be pleasant. Thoughtful storage, anti-fatigue support, ventilation, and planned breaks make longer sessions easier to manage. Audio can help some people settle into repetitive tasks, provided it does not mask alarms, approaching vehicles, spoken warnings, or changes in how a machine sounds.
If music or spoken audio is part of your setup, compare portable options through the guide to portable jobsite speakers. Keep volume appropriate to the environment and continue using necessary hearing protection around loud equipment.
Choose Practical Gifts for DIYers
Tool-related gifts are most successful when they respect the recipient’s existing setup. Before buying, learn which battery platform, fastener system, or accessory standard the person uses. Universal items such as layout tools, lighting, storage, protective equipment, and workshop comforts may be easier to match than a major power tool.
Experience also matters. A beginner may appreciate versatile basics and clear instructions, while a longtime maker may prefer replacement consumables, ergonomic improvements, or something that supports a familiar routine. For ideas aimed at an experienced family handyman, browse practical gifts for a handy grandpa.
Plan Your Next Step
The strongest DIY setup is not the largest one. It is the setup that lets you measure confidently, control the material, perform the required operation, and finish the job safely. Start with a defined project, acquire the essentials, and add specialized equipment only when a recurring need becomes clear.
As your skills grow, focus on accuracy, workholding, maintenance, and organization alongside power and speed. Those fundamentals connect home repair, construction, and fine woodworking alike. Use ForemanBrief’s individual guides to compare specific categories, then judge every choice by the work you actually intend to do.
Fall yard work Picks
leaf blowers
As an affiliate, we earn on qualifying purchases.